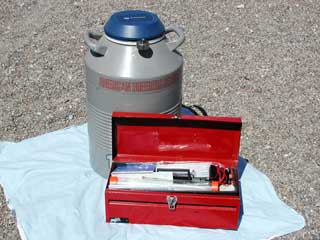
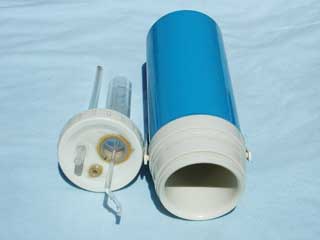
| Figure #1: This picture shows a typical semen storage tank and a metal tool box used to keep equipment clean and easily accessible. |
semen storage/tank design | a.i. equipment list | timing of insemination | semen handling | insemination procedure | cleaning equipment | record keeping
Introduction: The following information contains details on the equipment used for cervical and transcervical artificial insemination (A.I.), basic semen storage and handling, and how to properly inseminate an animal. This information should be used as a reference guide for basic questions. It is highly recommended that people beginning to learn how to A.I. take a course on A.I. or be instructed directly from someone who is knowledgeable in this area. Many of the skills, techniques, precautions, and common problems associated with A.I. cannot be outlined in this discussion. Hands on training and experience are usually necessary to reach satisfactory conception rates.
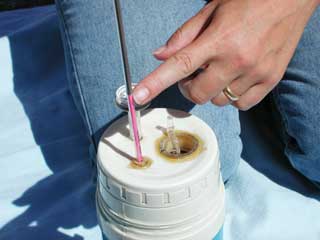
Semen Storage/Tank Design: Frozen semen is stored on the farm in a tank filled with liquid nitrogen. This unit is somewhat like a thermos bottle in design with a rugged outer jacket of aluminum or stainless steel and an inner compartment that contains liquid nitrogen and the canisters that hold canes of semen. The space between the inner and outer jackets is insulated and under extreme vacuum. A hard foam insulating plug extends from the top and continues down into the neck of the unit to minimize evaporation and keep foreign objects out of the tank.
The temperature of liquid nitrogen is -196°C (-320°F), and the space above the refrigerant but below the neck of the tank is only a few degrees warmer. Rate of evaporation or holding time depends on tank construction. The tank must be refilled before the nitrogen has completely evaporated (usually when there is approximately four inches of nitrogen left) in order to maintain the desired temperature. Depending on the tank, it may need to be refilled every 6 weeks to every 4 months.
The tank must be kept upright and protected from injury at all times. Damage may result in a loss of vacuum which allows evaporation to occur rapidly. If this goes unnoticed, the tank may go dry in less than 24 hours, and the semen will no longer be usable. A frost spot anywhere on the outer jacket indicates that nitrogen is boiling away, and the semen should be transferred to another tank immediately. The nitrogen level should be checked frequently and recorded between scheduled refills to ensure that the evaporation rate is not too great. The liquid nitrogen level in the tank can be measured by inserting a wooden yardstick into the tank for 10-30 seconds. Remove it from the tank and wave it vigorously for 5 seconds. The position of the frost line is equal to the depth of the liquid nitrogen in the tank.
Six to eight canisters, which hold a variable number of canes of semen, are suspended from the top of the tank neck. Each canister is a hollow metal cylinder open at the top with a perforated bottom. This construction allows access from the top while permitting liquid nitrogen and vapor to pass through the bottom.
Semen is usually packaged in 1/2cc straws. Straws are placed into containers called goblets, usually in groups of 5 or 10 straws. Two goblets snap into each cane, one above the other. At the top of the cane, a metal tab is marked with the buck’s or ram’s name or code number. To ensure positive identification, each breeding unit is labeled with the male’s registered name, his registration number, processor's name and the processing date.
It is very important to keep an accurate inventory of the contents of the semen tank. It will save time and reduce exposure to the warmer air outside the tank. The following are a few suggestions for maintaining an inventory:
Page K750 has an example of a semen tank inventory chart that can be printed and used to record the above information.
Caution:
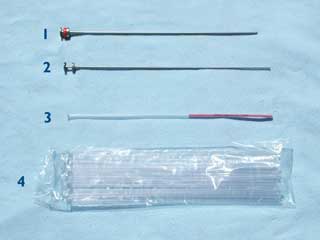
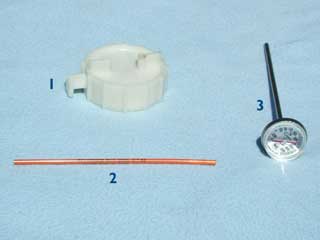
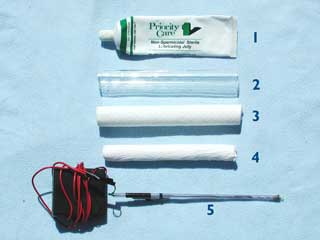
A.I. Equipment List (see figures 1-5):
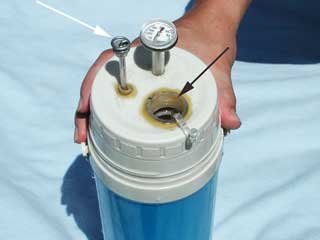
Warning: Dial thermometers work very well and are easy to read, but if dropped or damaged, they may not be accurate. Digital thermometers are very accurate and excellent to check against the dial thermometer to confirm accuracy. If the thermometer is inaccurate and the temperature of the thawing water exceeds 100°F, the semen could lose its fertilizing capability. It is acceptable for the semen to be 90°F, but the semen would be destroyed if it exceeds 100°F.
Artificial insemination equipment can be purchased from most semen processors or one of the dairy and farm supply companies that carry various sheep/goat related items.
Timing of Insemination: Proper timing of insemination is essential for conception because sperm cells can only survive for a limited time in the female reproductive tract. The cervix is most relaxed and easiest to penetrate during standing heat (estrus), and uterine motility favors sperm transport at this time. Ovulation tends to occur late in the heat period (approximately 18-24 hours); therefore, it is advisable to breed late in standing estrus. Females with regular, well-characterized heat periods are the best candidates for artificial insemination. This makes it easier to determine the proper insemination time than in females with irregular and subtle heats.
Standing estrus lasts approximately 24 hours in young females, but may last 2 to 3 days in mature animals. The female in estrus is generally easy to identify if a mature, odoriferous buck or ram is nearby. The female will pace restlessly along the fence, searching for a way to reach the buck/ram, or remain close to the fence. The vulva becomes swollen, and the tail may wag vigorously. A tail wag in a doe, which can be observed even in the absence of a buck, presumably has the function of sending pheromones from the doe's reproductive tract into the environment to attract a buck. Other signs of heat are decreased feed intake, decreased milk production, restlessness, and bleating more frequently than usual.
The vaginal discharge (mucus) at the beginning of heat (estrus) is clear and colorless. It becomes progressively whiter and more opaque towards the end of standing estrus in goats. Sheep often have less mucus production.
Animals should be observed through at least one entire cycle prior to attempting an artificial breeding. Record the timing and description of the first signs of being in heat, the progression of the heat cycle, the duration of the cycle, and the time the cycle apparently ends. Females should be observed at least twice daily, first in a group if the herd/flock is housed together, then individually.
Semen Handling: Frozen semen is a fragile product, and all temperature fluctuations decrease semen quality to some degree. For practical purposes, the most damaging temperatures begin in the neck of the tank where a transition to atmospheric temperature is evidenced by a frost line. The number of exposures to the warmer temperatures of the neck and the environment must be minimized. If implemented, the following tips will reduce temperature fluctuation and damage to semen:
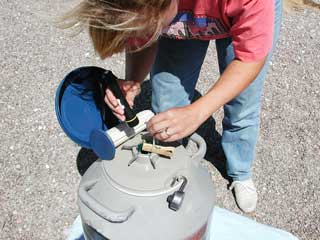
To remove a single straw from the tank, move the canister from its storage position into the center of the tank. Raise the canister slightly and, while it is still down below the neck, use a flashlight to locate the desired cane of semen within the canister. Lower the canister to the center floor of the tank for thirty seconds, then raise it again into the neck with the right hand and grasp the desired cane in the left hand. Lower the canister immediately, then use straw tweezers to grasp the desired straw. Bending the tab up at the top of the cane may facilitate straw removal. Do not bend straws. When the top goblet is empty, move it all the way to the top of the cane to facilitate removal of straws from the lower goblet. Because it prevents straws below from floating out of the lower goblet, do not remove the top goblet. Never keep canes up in the neck for more than 5 seconds.
To transfer entire canes from a shipping tank to the farm storage tank, place the two side by side. Position the receiving canister in the center of the tank, raise the canister in the shipper just high enough to grasp a cane, then lower the canister immediately while the transfer is being completed. This transfer must be completed within 5 seconds to prevent exposure to warm temperatures that can elevate the semen temperature to a critical point.
Special Note: Whether it is a liquid or vapor, liquid nitrogen is listed as a Hazard Material by the Department of Transportation.
Step #1 - Choose a proper location: Carefully choose the location of insemination. Avoid any area that either gets direct sunlight or has fluorescent lighting. Semen can be damaged if exposed to these rays for long periods of time.
Step #2 - Assemble equipment in one spot: A table close to the work area is especially handy for the inseminator who is working alone. Inspect all of the equipment, especially checking the speculums for cracks or chips. Make sure everything is in good working order.
Step #3 - Restrain the female: One restraint method for dairy goats is to put the doe on the milk stand, then position oneself on the doe's left side (for right handed inseminators). Put the left knee under the doe's barrel, back toward the flank. Lift the doe onto your left thigh. This leaves both hands free to work, but can be somewhat uncomfortable. An equally effective but less awkward method is to substitute a bale of hay for your leg. With the doe on the milk stand, lift her hind feet up and slide a bale of hay under her. The bale should be placed far enough back so that the doe’s rump is more or less level when she rests on the bale. Many experienced animals will allow the insemination process to happen while they are simply standing on the milk stand.
Most meat goats and sheep are held in a position where the hindquarters are elevated and the hind legs are held over a table or a bale of hay. Certain techniques in sheep (Guelph system) require that the ewe be placed on her back with the hind limbs pulled forward. Other surgical techniques (laparoscopic and embryo transfer) are used and can require that the animal be sedated and then placed in different positions.
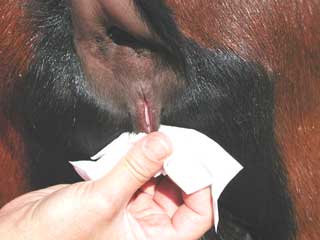
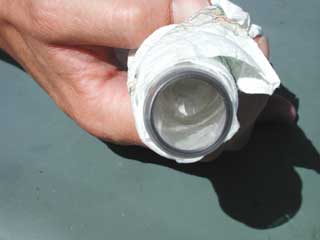
Step #4 - Prepare to insert the speculum (see figures #6-8): Wash the female's vulva and tail with antiseptic solution and dry the area completely. Lubricate the end of the speculum and vulva with non-spermicidal lubricant.
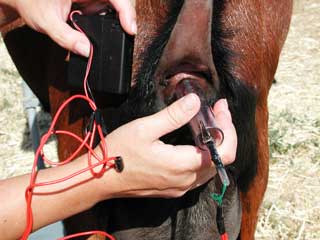
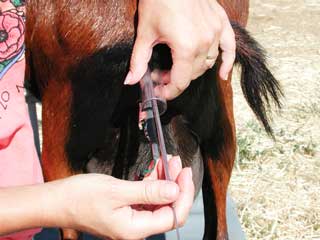
Step #5 - Insert the speculum (see figure #9): Use gentle but firm pressure to enter the vagina. Resistance will probably be encountered when the vagina is entered particularly in virgin animals. Try aiming slightly upward following the slope of the female's rump while applying gentle but firm pressure. Once you pass this point, the female will relax and you can pass the speculum to the end of the vagina.
Caution: Never handle anything with your hand that enters the female. Use paper towels or disposable gloves.
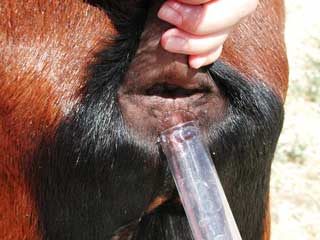
Step #6 - Locate the cervix (see figure #10): Using the A.I. light to assist visual inspection, pull back slightly and rotate the speculum hole to the six o'clock position (if you are using a speculum with an off-center hole). If using an open-ended speculum, no rotation is necessary. The cervix is on the floor of the vagina when the female is in heat, and will protrude slightly. It appears as a dark red spot or hole and may look like tiny pursed lips. If mucus interferes with this procedure, vacuum it out by inserting a sterile pipet attached to a syringe and sucking the mucus out through the pipet (discard the pipet).
Step #7 - Evaluate the cervix and mucus: Does the cervix appear open? Try passing an empty sheath to test for penetration of cervix. If it is closed and dry, the female is not in heat. The mucus should be thick and cloudy in a female that is in heat and ready to be bred. If it is clear and watery, the female is early in estrus and insemination should be delayed. If the female is ready to be bred, begin thawing the semen.
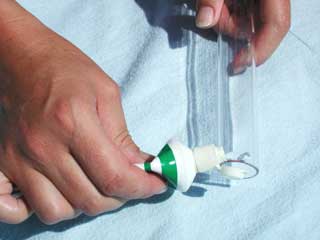
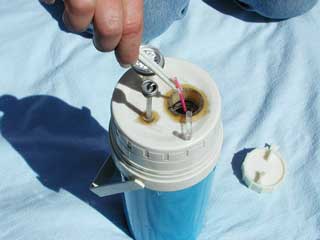
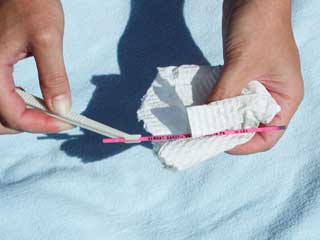
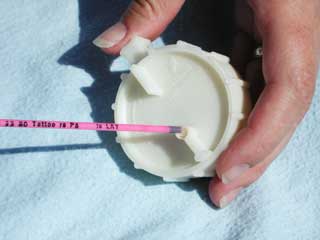
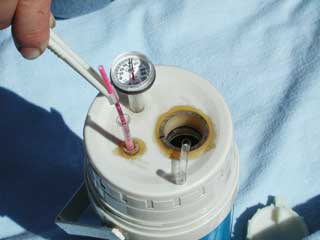
Step #8 - Thaw the semen (figures 11-14): Fill the thaw jar with 95°F water, and check it frequently to ensure the temperature is constant, adding more hot water if necessary. Remove the desired straw from the tank (as per instructions mentioned previously) and immediately place it in the thaw jar, handling the straw by the tip only or with the straw tweezers. (The warmth from a person's fingers can cause the semen to warm unevenly, thus lowering the number of live sperm post-thaw.) Remove the straw from the thaw jar after a minimum of 30 seconds. If properly handled, the semen will remain viable for up to 15 min. post-thaw. Water is spermicidal, so dry the straw thoroughly with a paper towel.
Step #9 - Preparation of the artificial insemination gun: There are several types of inseminating guns on the market. It is recommended that the instructions for loading each gun be followed exactly. Warm the A. I. gun if necessary by rubbing it rapidly between the hands before the semen straw is loaded. Now wrap the gun in a paper towel and keep warm until it is ready to be used.
Caution: To keep it sterile, never touch the tip of the insemination gun.
Step #10 - Penetration of the cervix: Guide the tip of the A.I. gun through the cervix. Occasionally it will pass completely through the cervix and into the uterus with almost no pressure in goats. Other times the gun may be very difficult to pass through the cervix; this is often the case in sheep. When the gun does not pass easily, the gun tip must be carefully manipulated into the cervical rings with firm pressure and a twisting motion. Often one can feel each cervical ring as the tip passes through. In many cases, the passing of the insemination gun through one of the cervical rings feels like pushing the tip of the gun through a paper towel. The cervix is usually one and a half inches long in goats. If the depth of penetration is greater than this in goats, withdraw the gun to one and a half inches of cervical penetration. Once through the cervix, be alert and do not rake the uterine lining with the tip of the gun.
In sheep, the cervix is much longer (3 inches) and much more difficult to pass through. In most cases, the cervix cannot be penetrated completely and the semen will be deposited in the cervix itself. Realize that the best conception rates occur when the semen is deposited in or as near to the uterus as possible. Because of this knowledge, some sheep producers use other systems of A.I. to better penetrate the cervix. Surgical techniques (laparoscopic and embryo transfer) are also used in many parts of the country. These systems require different tools and special techniques that are beyond the scope of this material.
Step #11 - Deposit the semen: Use slow and steady delivery, over at least 5 seconds. Remove the A.I. gun, and slowly remove the speculum.
Cleaning Equipment: While artificial insemination cannot be completely aseptic, it should be performed in as clean a manner as possible. Insemination sheaths are disposable and should be used only once. Glass speculums should be soaked immediately after use and then washed in soapy water with a test tube brush. Rinse them thoroughly, then sterilize them by boiling (5 minutes) or baking. After the speculum has been sterilized, wrap it in individual paper towels to keep it clean until the next insemination.
Caution: Because they can be damaged, do not bake or boil plastic objects; soak these materials in diluted chlorhexidine and then rinse the objects thoroughly.
Record Keeping: A certain percentage of inseminations will fail to result in conceptions. The best way to determine why the attempt failed is to keep accurate records on each animal’s cycle and each insemination. In addition to notations mentioned earlier in the timing section, one should record the following: time of insemination, appearance of cervix and cervical mucus, depth of penetration, and unusual circumstances that may have occurred.
In evaluating a missed conception consider these questions: Was the female in late standing heat? Was the insemination too early or late? Was the air temperature below freezing (this could chill thawed semen and kill sperm)? Was the cervical penetration insufficient? Was the female cycling normally?
Insemination Equipment:
 |
|
 |
|
 |
|
 |
|
 |
|
The Insemination Procedure:
 |
|
 |
|
 |
|
 |
|
 |
|
 |
|
 |
|
 |
|
 |
|
 |
|
 |
|
 |
|
 |
|
Note: Here is a partial list of things that can kill sperm or are spermicidal:
1. Water
2. Sunlight
3. Florescent lighting
4. Excessive heat
5. Thawing too slowly or too quickly
6. Blood
The previous information was used with permission from The American Dairy Goat Association’s "Dairy Goat Artificial Insemination Booklet" 1996.